Thursday, July 5, 2012

Red, White, and Blue felt flag

Patriotic Flag Wreath 


I made this using the instructions from Capital B's blog but I changed a few things. http://ssbuffat.blogspot.com/2010_06_01_archive.html

I used:
*plumbing foam tube
*6 red sheets of felt
*6 white sheets of felt 
*4 blue sheets of felt
*scissors
*3 boxes of 100 pearl head pins (sewing section of Walmart)
*Sharpie, Highlighter, pencil, or pen (to curl wire)
*jewelry wire (silver)

Step 1:  Create the wreath form by using plumbing foam tubing. 
I bought a plumbing foam tube @ Lowe's for less than $2.00.   Cut the tubing in half.  You'll have enough for two separate wreaths.  If you want your wreath to be 18" or 24", you can measure the tubing before cutting.  I measured out 24" for mine and still had enough for a for two wreaths.  Remove the vellum and carefully stick the piping together.  Then, Duct tape the ends together.  

Step 2:  Cut the Felt 
I found the felt sheets in the stationary/kid's craft section @ Walmart.  They were only about $0.23 per sheet.  If you can't find the sheets you can always use fabric from the bolt.  I couldn't find blue felt sheets so I bought a half yard on the bolt @ Walmart.  You'll only need about 1/4 a yard of the blue.


Cut the felt into 2" X 2" squares.  This takes quite a bit of time.  This is the most time consuming part.  You may want to put on some music or the television to complete this part.  


Step 3:  Folding and pinning the squares onto the wreath
Fold each square in half (diagonal/triangular) and then in half again (diagonal/triangular).  You can refer to the website above if you need pictures.  Carefully hold the folded felt and pin it at the end.  Connect four corners (of folded felt) together creating a "flower" with your felt.  I made about two/three rows of each color.  You can fill in as you see a need.  I covered my pearl pinheads by tucking another piece of folded felt into a nook over top of the pins.  I like the pearl head pins because if you do see them, they are pretty.  Colored pin heads don't look as great.  
Create the colors above by repeating this pattern until you have your desired amount of coverage.  I took leftover colors and folded them into crevices.  


Step 4:  Curl wire on a Sharpie, highlighter, pen, or pencil
Once the wire is your desired length, stick it into the blue part of the wreath and adhere a white star to the middle of the wire.  I printed off a star template and used it to trace and cut out tag board stars.  


Wednesday, June 20, 2012

How to Dye Cheesecloth

How to Dye Cheesecloth

There really isn't an exact method to this process.  Just make sure you don't add too much dye or put more than one cheesecloth into the washer/dryer at the same time.  

Materials needed:
*Cheesecloth...I bought mine in a small pack (36" x 3 yd) at Wal-Mart for $2.97, and cut it in half.  This comes in a clear, plastic bag (see below).  It is found in the sewing section.    
*Scissors to cut cheesecloth in half or fourths (larger pack)
*Rit Dye (Liquid or powder work fine.)
*Bucket (A car washing bucket works best.)
*spatula (can be bought @ dollar stores)
*pot to heat up water (I used a canning pot just to warm the water.)
*salt
*disposable gloves (especially if you are using powder)
*You may need to use a mask when using this dye if you don't have a window to open and are using this indoors.


Before I knew how much dye to put into the bucket of water, I put in the whole pack of green dye.  This is why the Lime Green is more like a forest green. I would suggest carefully adding your dye.  


Step 1:  Open up the cheesecloth packet.  Get your scissors, and cut the cheesecloth in half (if you are using the smaller package, 36" x 3 yd).  They will be a tad bit larger if you use the larger pack of cheesecloth and cut it into fourths.    


Step 2:  Heat up a pot of boiling water.  I usually just fill a canning pot about 1/2 to 3/4 full.  You will add salt into your pot after the water has boiled.  There is no set amount of salt that I use.  I'd say about three good pinches.
Step 2:  Open up a window if you are going to do this inside.  You may even want to turn on your fan.  The smell can fill your house; and it can cause a headache.
OR  You can take your bucket of boiling water outside along with your dye, spatula, and cheesecloth.
Step 3:  Put your Bucket into the sink.  When the water is very hot or boiling, you can transfer your water into your bucket.  Add a few pinches of salt.  There is no accurate amount.  

Step 4:  If you are dying your cheesecloth indoors, put some of your dye into your bucket of hot water.  If you are dying it outdoors, take your bucket of hot water outdoors before you add the dye.  
Remember you can always add more dye but you cannot take it away.  I would start with just a little bit.  Cheesecloth soaks up lots of dye.  It will develop a tad bit richer color after it has been soaking.  The more dye you put into the bucket, the darker/richer the color will be.  Below you will see the difference in adding a little color vs. adding a lot of color.  I added just a little bit of dye for the lighter one and about half a bottle/box of dye for the darker/brighter one.


Step 5:  You can wash your cheesecloth with laundry detergent (hand wash) or just wet it with cold water.  Carefully add your wet cheesecloth to the bucket of dye.  Like I said earlier, you can always add more dye.  As soon as you've put your cheesecloth into the dye you will be able to lift it out of the water (with your spatula) to determine if you need to add more dye.  Gradually add enough dye until you are satisfied with the color.      

Step 6:  The cheesecloth needs to sit in the dye about 20-30 minutes.  Some bottles say continuously stir and others say stir often.  I usually stir about every five/ten minutes.  You can continuously stir if you have the time.

Step 7:  After 20-30 minutes have passed you may use the spatula to carefully pick up the cloth to ring out.  This is where you will definitely need your gloves.  If you are inside, the bucket will still be in the sink.  You can just transfer the cloth to the other side of the sink and rinse out.  When I did this outside I put on my gloves, rang out the excess dye very well, and brought it inside to rinse it in the sink.  


Step 8:  Here you will need to use laundry detergent to wash the cheesecloth.  I suggest you use cold water to wash out your cheesecloth.  You may choose to wash your cheesecloth in the washer.  However, I was warned on a previous blog that you do not put more than one cheesecloth into the washer or dryer.  They will tangle!  I just hand washed the cloth in the sink and rang them out until there was no dye present in the water.  I actually used laundry detergent made specifically for babies.  I am using these cloths for maternity and newborn photography.  


Step 9:  Dry your cheesecloth.  I have dried the cloth by hanging them on hangers in the laundry room.  With this method they will be more stiff.  You can just pop them into the dryer, after they have dried on the hanger, to soften them up.  I have also dried them in the dryer.  This works well but set your dryer on the gentle cycle, and only put one cheesecloth in the dryer at a time.  This only took about fifteen minutes (with my newer dryer).    


Step 10:  Rewash your cheesecloth (if you wish).  I was concerned about the dye irritating a baby's skin.  I washed and dried my cheesecloth three times.  Each time a little bit of the dye was still present, even after I had rang it clean previously.  It will shrink a little bit.  However, rewashing will help the cheesecloth become more pliable and softer.  This is recommended if you are going to wrap babies in this material.   
                                      

Step 11:  Enjoy!  You now have cheesecloth to use in newborn photography, maternity sessions, or other projects.  


Warning:  If you are going to use these material for photography, make sure you are supervising the baby.  Never leave a baby unattended with this material.  Just like most materials, a baby could suffocate if the material covers their face for long periods of time.      


<a href="http://pinterest.com/pin/create/button/?url=http%3A%2F%2Fhousetohomecrafts%40blogspot.com&media=http%3A%2F%2Fhousetohomecrafts.blogspot.com%2Fsearch%2Flabel%2FHow%2520to%2520Dye%2520Cheesecloth&description=How%20to%20Dye%20Cheesecloth" class="pin-it-button" count-layout="horizontal"><img border="0" src="//assets.pinterest.com/images/PinExt.png" title="Pin It" /></a>


Monday, April 16, 2012

Spring Garden

 Verbena, Petunias

 The Snapdragons returned!

My first Double Delight rose

 purple iris

two tone iris

purple iris

my irises

yellow climbing rose bush (Golden Showers)

 Golden Showers rose bush

purple rose bush

 pincushion flowers 

two tone iris

Sunday, April 8, 2012

Spring decorations

                                                                             Spring 
I love Subway Art!  I googled Easter Subway Art and found this.  There were many different colors to choose from to match your decor.  It was free online.  The frame is from Walmart.  I think it was only $4 or $5.  

I love lanterns!  They are so easy to decorate seasonally.  I bought these glittered eggs at a local home store.  I'm sure they could easily be made with an egg shaped styrofoam ball.  The moss was from Michaels or AC Moore.  I didn't use much of it for this decoration.  My mother and I got these lanterns from Lowe's after the summer season (at a discount).

I also love decorating vases.  I bought this vase from Michaels for my wedding candy table.  I can't remember where I bought the eggs; I've had them for a while.  

The Live Laugh, Love is my everyday decor.  I do change the candles on top for the fall and Christmas.
The candles are from Celebrating Home.  They no longer have these candles.    
 
My father just happened to be changing out the wooden porch posts...recycling :-).  I asked if he could cut and stain them (with certain dimensions in mind).  I bought these vinyl letters from an Uppercase Living party.  I do have a Cricut that I have made vinyl lettering with.  I have thoughts of other projects similar to this one.     

This is my "green house" that I use inside.  I bought the bird and nest from Simple Elegance in Franklin, NC.  The spring flowers were bought from a Celebrating Home  party.


Thursday, April 5, 2012

Signs of Spring

My Snapdragons have reappeared!  They are covering my rose flowerbed.  :-)  

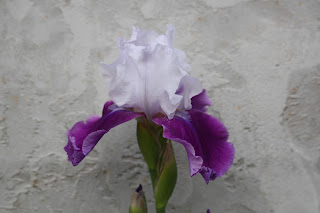
This is my first Iris bloom.  It's not the color I expected it to be but it's beautiful.  

Tuesday, March 20, 2012

Burlap Peacock Wreath

Mom and I spent a few hours making this wreath and her wreath.  Mom bought burlap fabric from a local fabric store.  We cut the burlap into 4x4 squares.  I think we cut out 250 squares.  There was a mess on the floor from the burlap.  We actually used a foam pipe from Lowes to make the wreath form.  We just cut the foam in half and taped it with Duck Tape.  Then we wrapped the form with burlap to hide the gray.  We made "bubbles" with the squares by tucking two opposite sides inward (and doing the same to the other sides).  To secure the bubbles to the wreath form we used 100 pearl head pins (from Walmart).  When I was finished, I attached peacock feathers to the wreath with hot glue.  I also hot glued a letter "E" that I painted to match the peacock feathers.        

Flower beds

This is the first flower bed my husband made for me.  It had mums and impatiens.  Now I have Cala lilies, Rain lilies, Asiatic lilies, Gerbera daisies, Gaura, and Phlox in these beds.  I also plant tulips for the spring.  

This is the flowerbed my dad built for me last summer.  This was taken a few days ago.  The daffodils are in bloom!  In the summer gladiolus grow tall against my home's exterior.  

Baby Shower centerpieces

This is the diaper cake I made for my nephew, Hunter in 2008.  It has a frog puppet on the top.  

This is the back of the diaper cake.  


This is my first diaper cake.  It isn't as elaborate as the others but it was my first one.  I made this one for my best friend, Tiffany's baby in 2007.  

Mom and I made this bubble bath for my baby cousin a few years ago.  We used silver/white balloons to make the bubbles.  It was difficult to tape the ducks on top.  I think we could have found a better way to secure them.  This did turn out cute though.